Article
Tutorial: Jupyter Notebooks on Archil
•
read
From Scratch to Analysis: Setting Up Jupyter on EC2 with S3 and Local Storage
Move fast. Iterate often. Deliver insights without getting slowed down by infrastructure overhead.
The holy grail of analytics engineering. But achieving that level of speed and simplicity, without sacrificing scalability, security, or maintainability, has historically been difficult. Most solutions require stitching together brittle pipelines, wrangling low-level SDKs, or provisioning heavyweight platforms that add more friction than value.
This architecture elegantly solves these challenges through a powerful three-part system:
- A fully configured Jupyter Notebook server on Amazon EC2 delivers interactive, on-demand compute that seamlessly scales with your analytical workloads.
- Amazon S3 serves as your central data lake, providing durable, cost-effective storage for everything from raw inputs to processed outputs and notebook artifacts.
- **Archil** connects these components by mounting your S3 bucket as a POSIX-compatible virtual file system, completely eliminating the need for boto3, staging logic, or messy temporary downloads.
With Archil, S3 becomes a first-class data layer: queryable, cache-aware, and seamlessly compatible with your local tools. Open a CSV, write a Parquet file, stream a massive dataset—directly from S3, no staging, no SDKs. Whether you're using pandas, pyarrow, or just native Python file I/O, it works exactly how you expect.
The result is a cloud-native analytics environment that gets out of your way and accelerates iteration. From early-stage exploration to production ready workflows, this setup delivers the performance and simplicity modern data teams want.
Now, let's build it.
Step 1: Spinning Up Your EC2 Instance
Amazon EC2 (Elastic Compute Cloud) provides flexible, resizable virtual machines in the cloud. For our architecture, EC2 acts as the dedicated compute layer where we will host Jupyter Notebooks and mount Archil for seamless access to S3-resident data.
But why EC2?
EC2 provides the perfect environment for our analytics setup with multiple advantages: it offers scalable computeresources that can be adjusted based on your workload requirements, remains persistent and accessible for continuous data analysis without interruption, and provides co-location with your S3 bucket in the same AWS region for optimal performance and reduced data transfer costs.
This gives us the control of a local machine, scalability of the cloud, and a solid foundation to build an interactive, cloud-native data environment.
Configuring Your EC2 Instance: Step-by-Step Guide
First, navigate to the AWS portal and find your way to the EC2 resource dashboard.
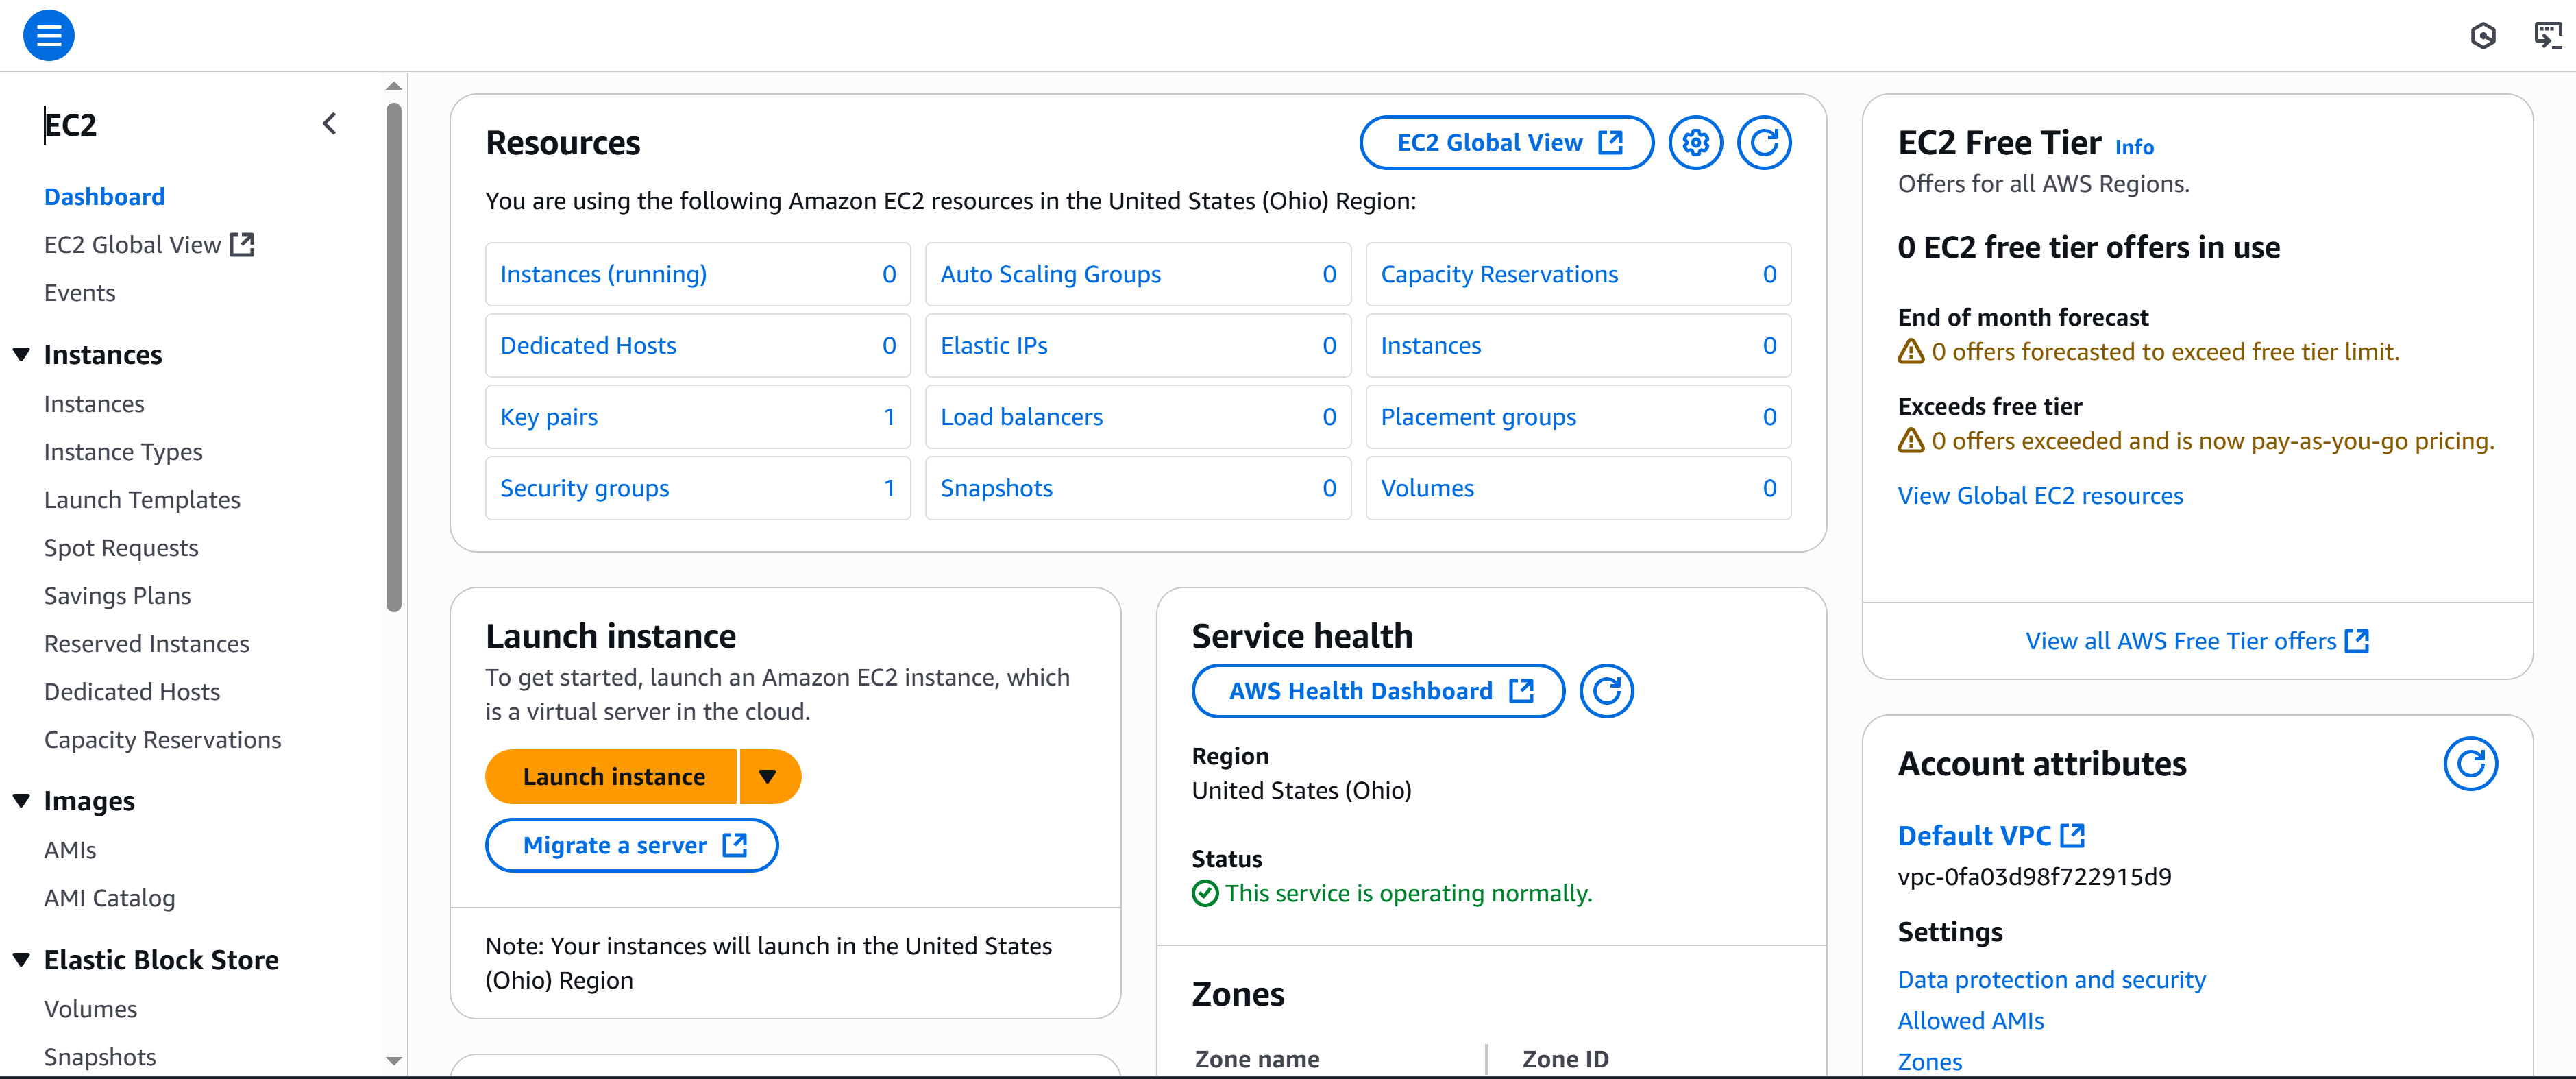
When creating your instance, choose a type based on your expected workload:
- Use t3.medium or t3.large for lightweight analysis and exploration
- Use m5.large, c5.xlarge, or r5.xlarge for memory-intensive data processing or parallel workloads
For this setup, we'll use a Linux-based EC2 instance, as Archil disks can only be mounted on Linux servers running in public clouds like AWS or GCP.
Select an AWS region that's close to your geographical location to reduce latency, and ensure it's in the same region as your S3 bucket to avoid cross-region data transfer fees.
Configure your security group to control external traffic to your instance:
- Open port 22 (SSH) to your IP address for secure terminal access
- Open port 8888 (Jupyter) for your browser to connect via SSH
This configuration ensures your development workflow and Jupyter interface remain accessible and secure.
Finally, generate a key pair when launching the instance. You'll use this private key to connect securely from your terminal.
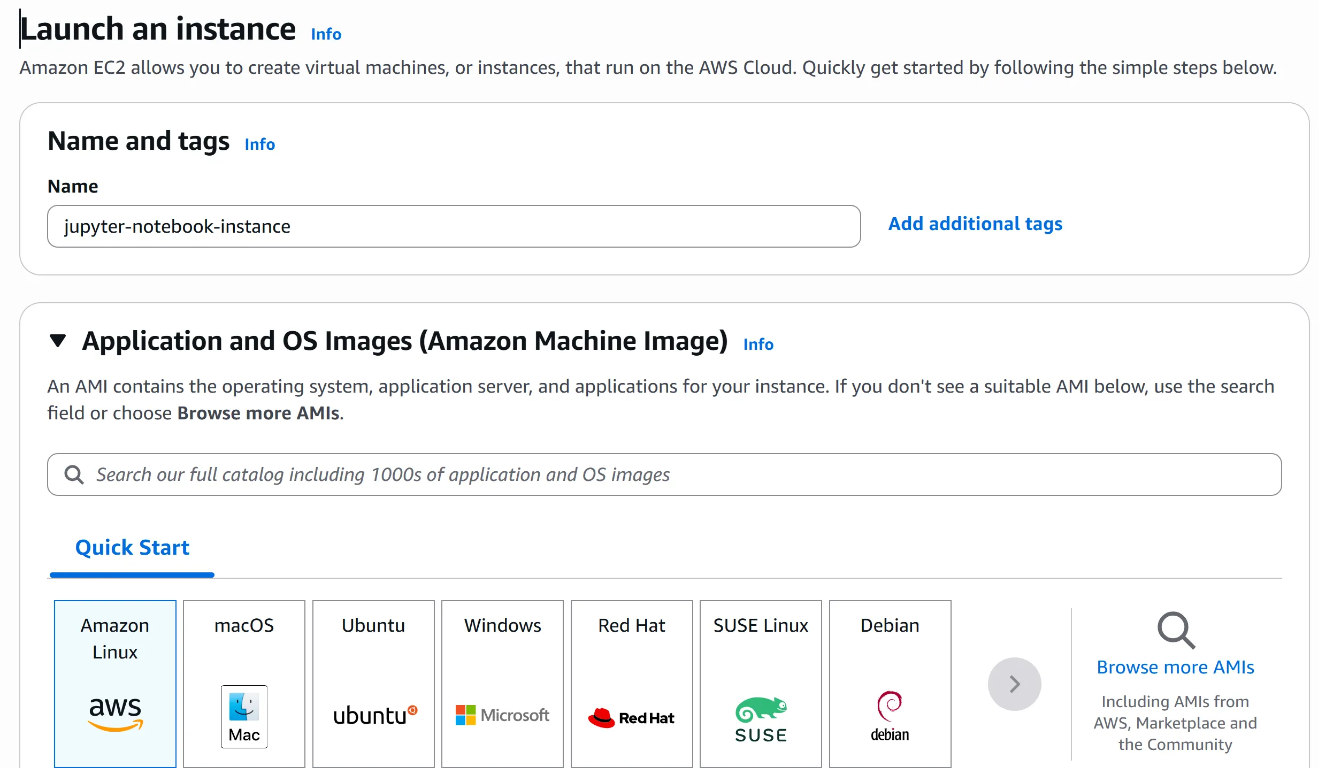
The User’s point-of-view when launching an EC2 instance
At this point, you have a blank Linux server in the cloud; think of it as your personal remote laptop.
Next, we'll install the tools that turn it into a fast, flexible data lab.
Step 2: Installing Jupyter Notebook
Jupyter Notebooks are interactive computing environments that allow you to create and share documents containing live code, equations, visualizations, and narrative text.
They're widely used in data science, machine learning, and scientific computing for their ability to combine executable code with rich text elements, enabling an iterative, visual approach to data analysis.
Now, let's dive into the technical implementation.
First, we need to SSH into the EC2 instance. If you're using Mac or Linux, you can connect directly from your terminal. If you're using Windows, you'll need to use an SSH client like PuTTY or Windows Subsystem for Linux (WSL).
SSH into the instance.

Go to your instance, and navigate to the Connect tab → SSH client and follow the instructions from there to connect.
If you are running on WSL, you might face some issues relating to the security of your .pem file if it exists within your Windows directory.
Simply create a WSL home directory and issue the commands from there.
Running Jupyter Notebook on EC2 with Secure Local Access
Once your EC2 instance is up and running, the next step is to install Python tooling, launch the Jupyter Notebook server, and expose it securely to your local browser via SSH tunneling.
1. Install Python, pip, and Jupyter Notebook
Amazon Linux 2023 includes Python 3, but you'll need to install the package manager and Jupyter:
sudo dnf update -y
sudo dnf install -y python3-pip
pip3 install notebook
Note: Amazon Linux 2023 uses the dnf package manager (not yum or apt).
Next, verify your installation:
python3 --version
pip3 --version
jupyter --version
2. Launch Jupyter Server
Run this command in your EC2 terminal:
jupyter notebook --no-browser --port=8888
You'll see a URL with a security token, copy it and save it to access your Jupyter Notebook locally from your browser.
<http://localhost:8888/?token=><your-secure-token>
Keep this terminal window open to maintain the server running.
3. Set Up SSH Tunnel
On your local computer, open a new terminal and create a secure tunnel.
If you are unfamiliar with tunneling, in computing, an SSH tunnel is a secure method for creating an encrypted connection between a local computer and a remote server. In the context of our setup, it refers to port forwarding through SSH, which allows you to securely access services on a remote machine as if they were running locally.
Issue this command with your path/IP address.
ssh -i /path/to/first-key-pair.pem -L 8888:localhost:8888 ec2-user@<your-ec2-public-ip>
- Replace
/path/to/first-key-pair.pemwith your actual key file path - Replace
<your-ec2-public-ip>with your instance's public IP address
This forwards your local port 8888 to the EC2 Jupyter server securely. Keep this terminal open during your Jupyter session to maintain a persistent connection.
4. Access Jupyter in Your Browser
Open your web browser and navigate to the localhost:8888 URL with the token that we obtained from Step 2 when launching the Jupyter Server.
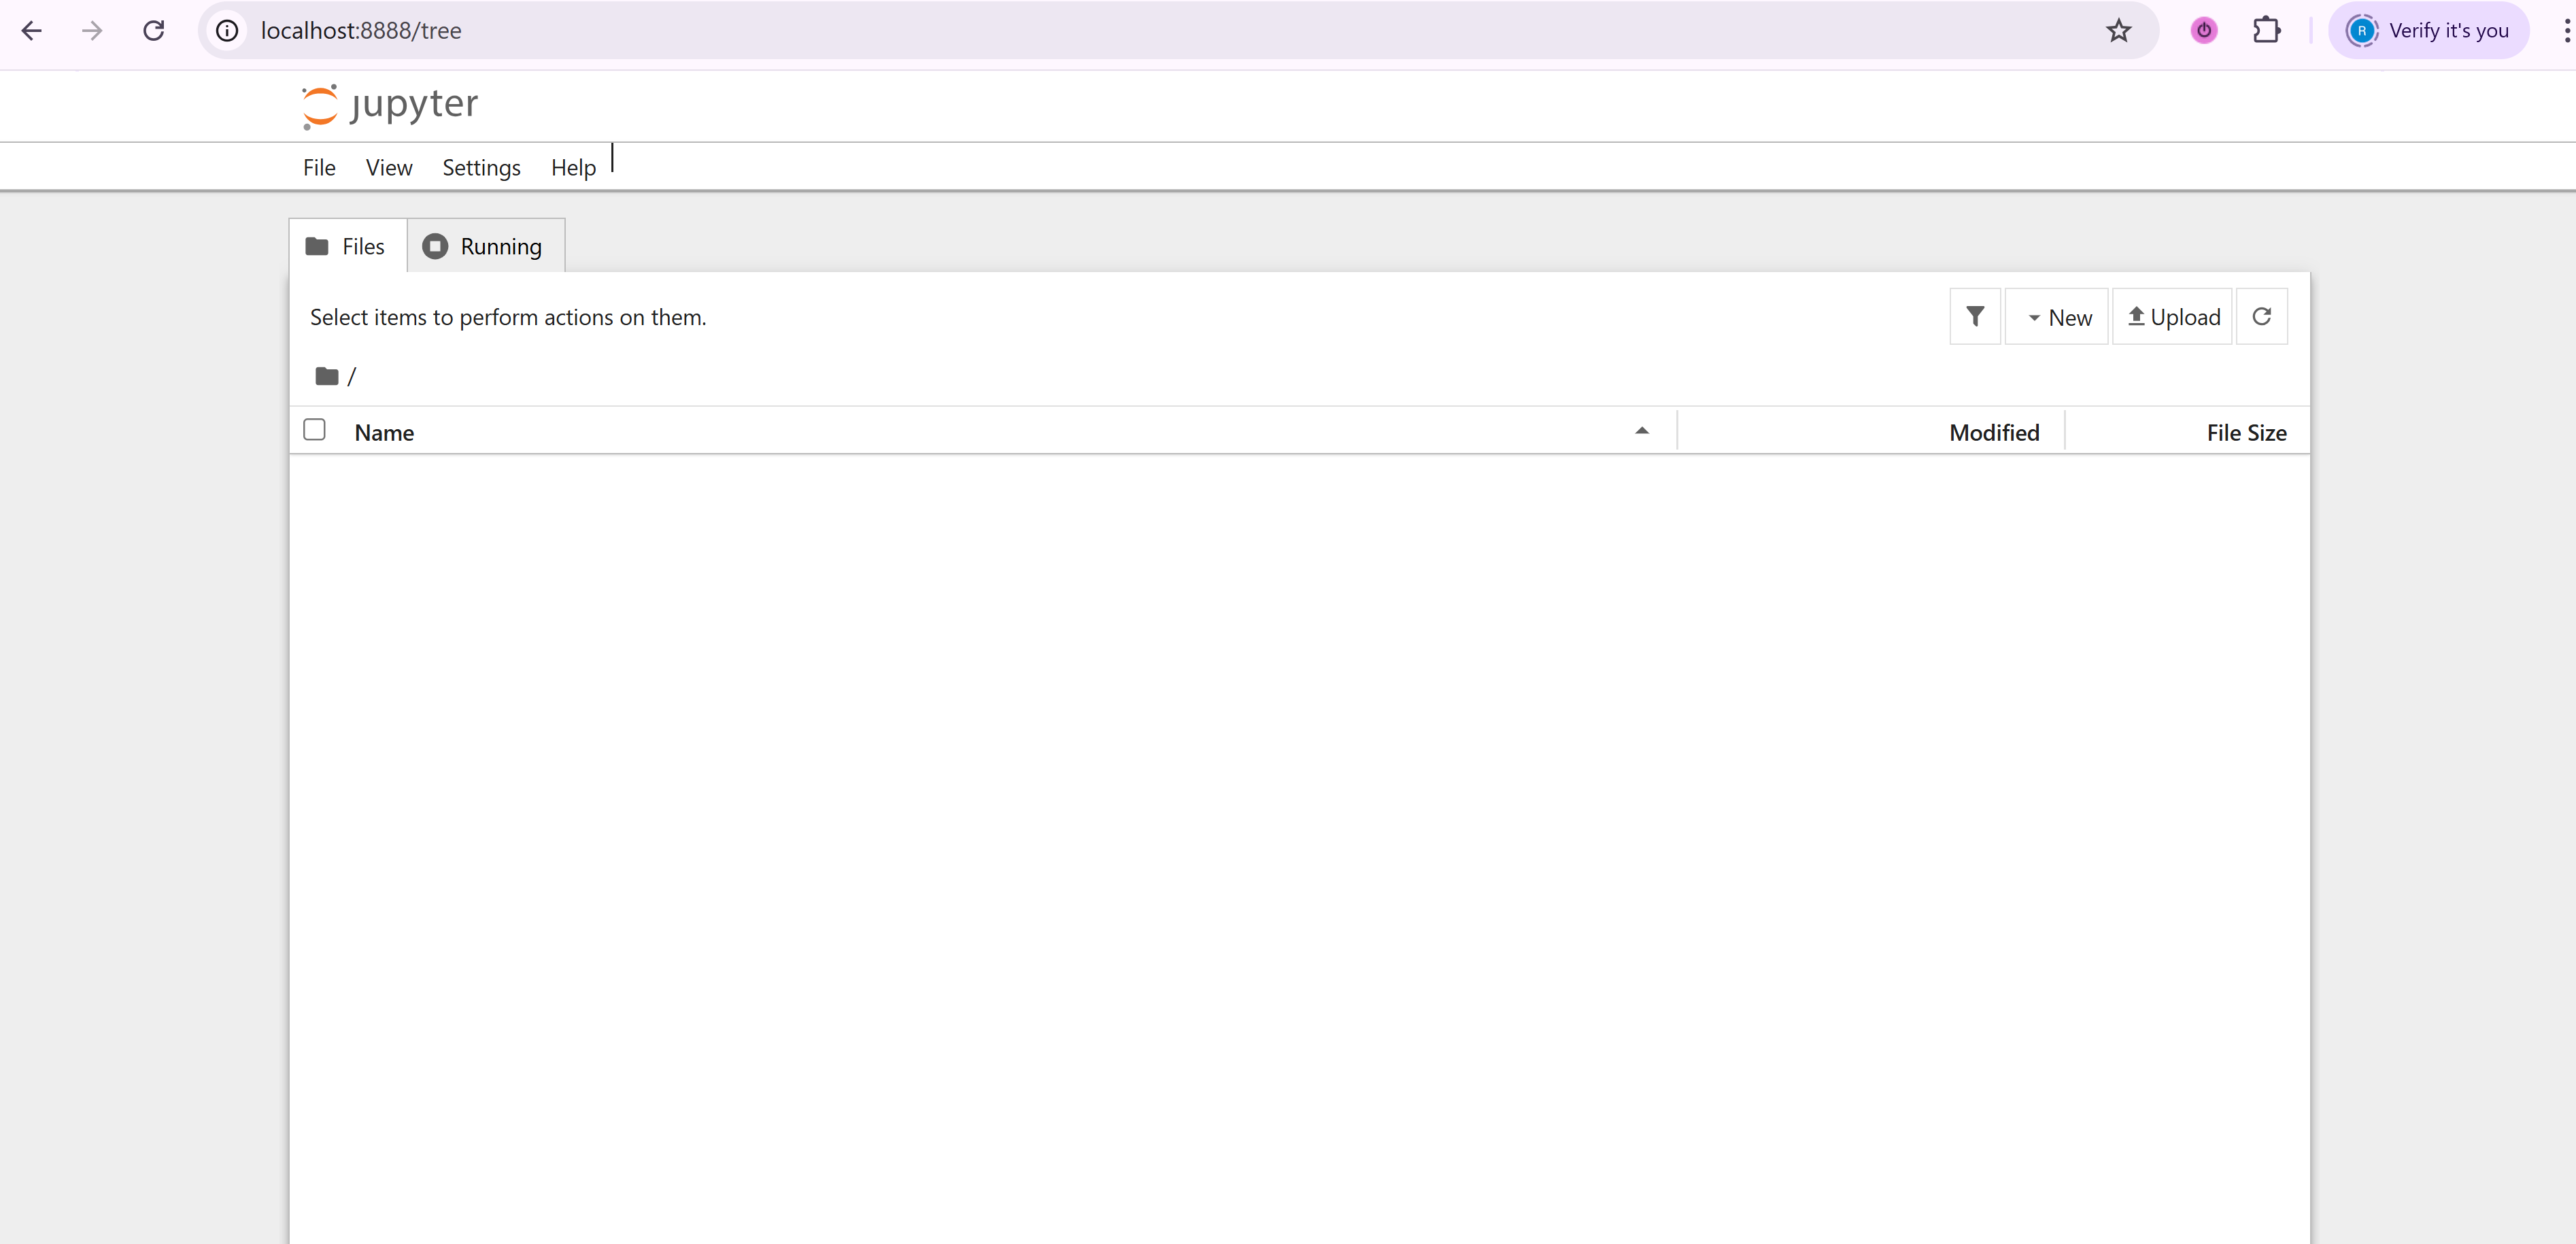
You now have a fully functional Jupyter environment running on EC2.
Step 3: Creating an S3 Bucket and Uploading Data
With computing power established, let's set up storage. Keep both your terminals running during this.
Access the AWS Console, navigate to S3, and create a bucket in the same region as your EC2 instance.

Next, let’s find some sample data for your analysis.
The NYC TLC website offers excellent datasets with rideshare information—great for beginners with geographic data, trip analysis, and visualization projects.
Download and upload your data to S3:
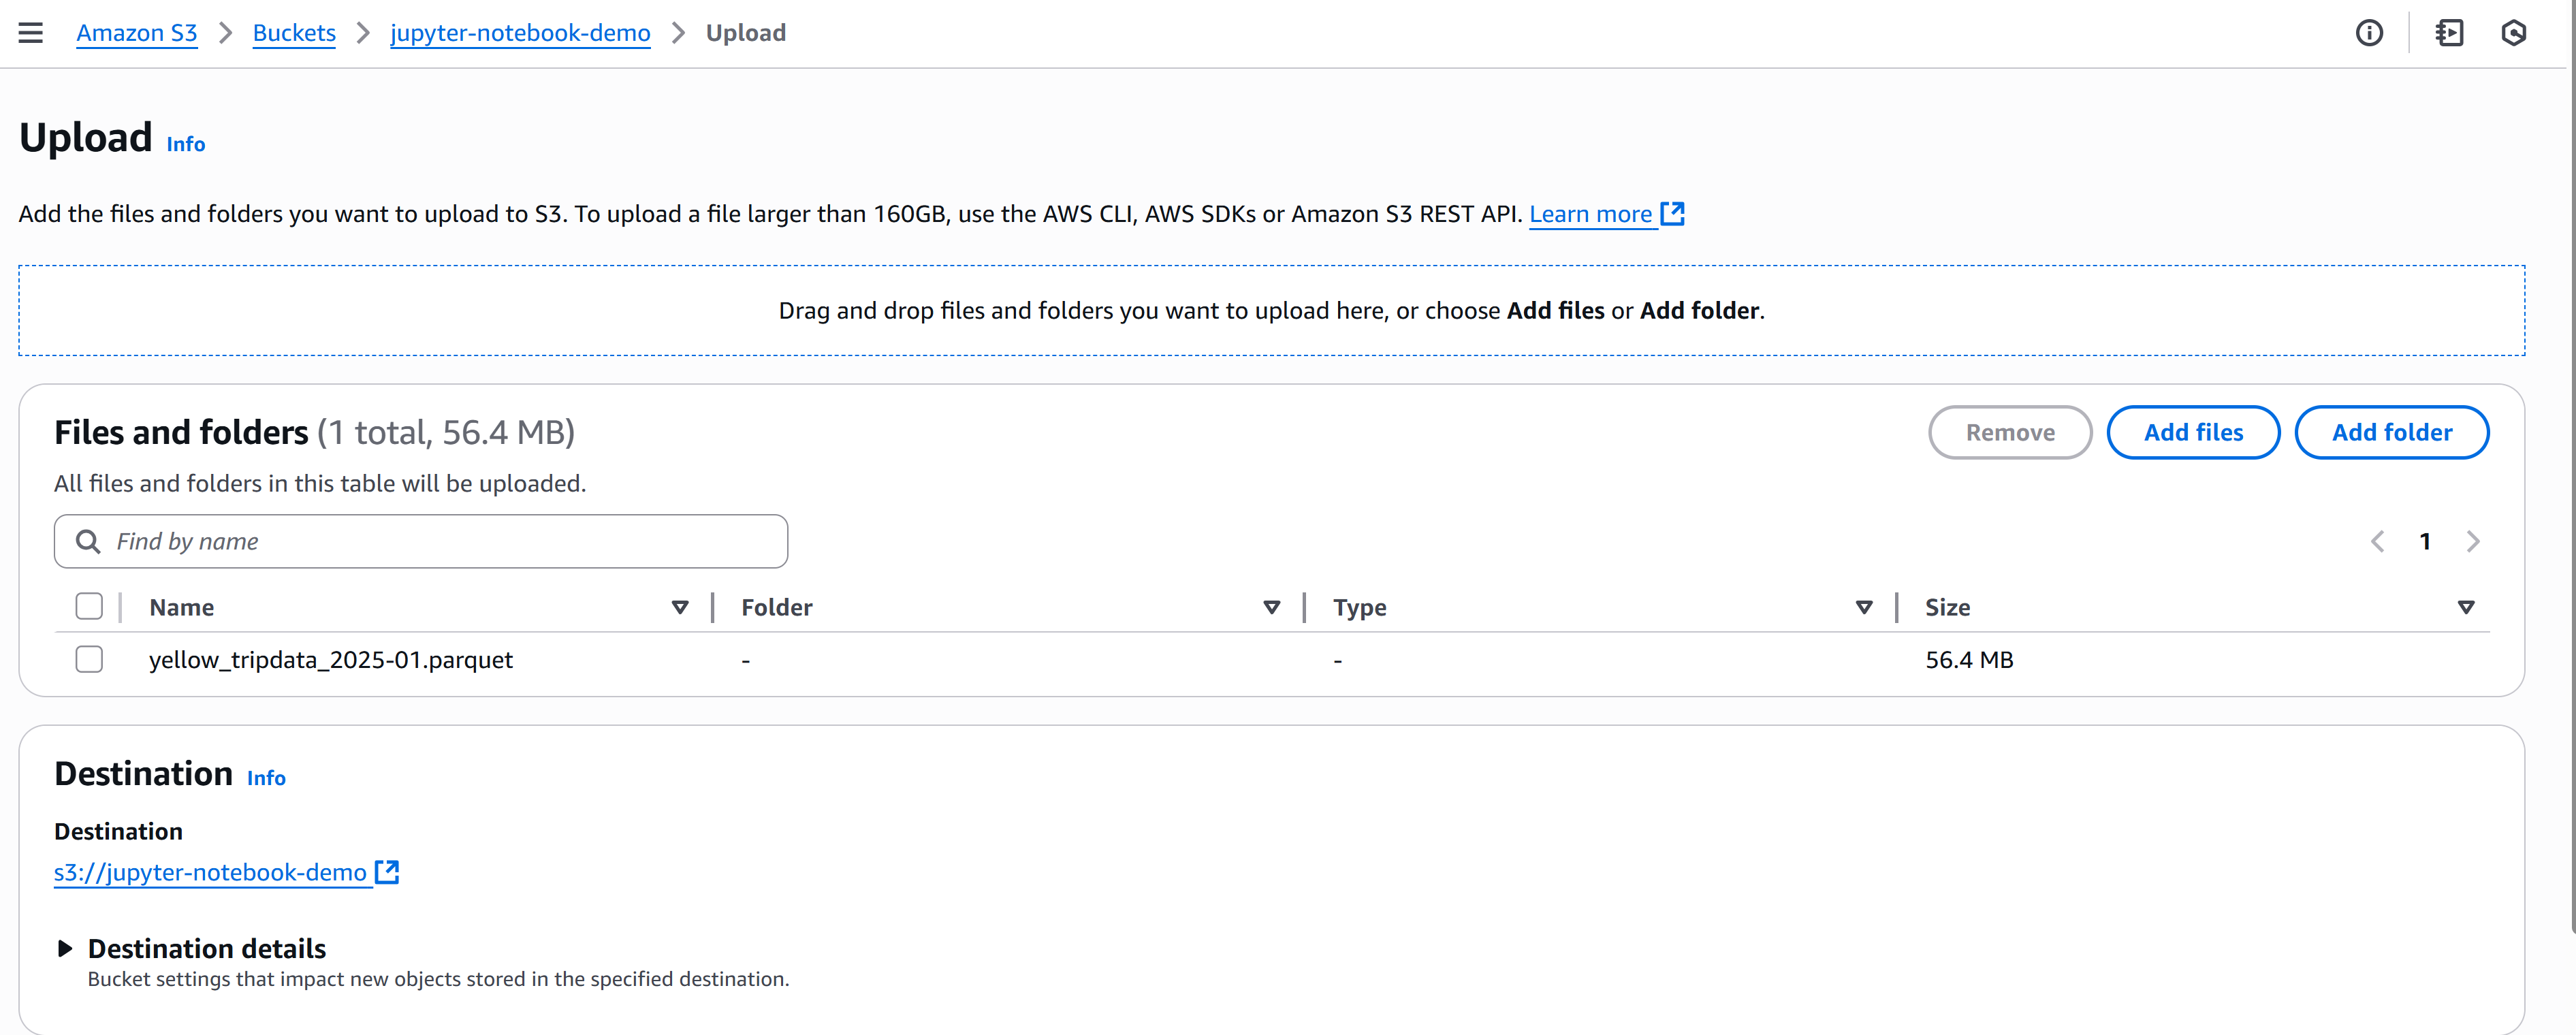
With your S3 bucket populated, we're ready to configure Archil.
Step 4: Configuring Archil for POSIX-Compatible S3 Access
To enable high-performance access to your S3-stored datasets, we configure Archil to expose your bucket as a POSIX-compliant virtual file system. This allows your EC2-hosted Jupyter environment to interact with S3 files as if they were on a local disk. No need for boto3, signed URLs, or custom download scripts.
What Benefits Does Archil Provide
- Removes S3 boilerplate: No client libraries, auth config, or object key management
- Optimized for analytics: Built-in caching and streaming support for large files
- Drop-in file access: Compatible with standard Python and UNIX tools (
pandas,dask,pyarrow,open(),ls, etc.) - Secure and scalable: Access is granted via IAM role delegation; no hardcoded AWS keys
Follow the steps in the Archil Quickstart guide to:
- Create an Archil File System backed by your S3 bucket
- Apply the IAM policy or generate a token to authorize access
- Note: If you do not have an IAM policy setup, create one for the EC2 instance.
- Mount the virtual file system at
/mnt/archilon your EC2 instance
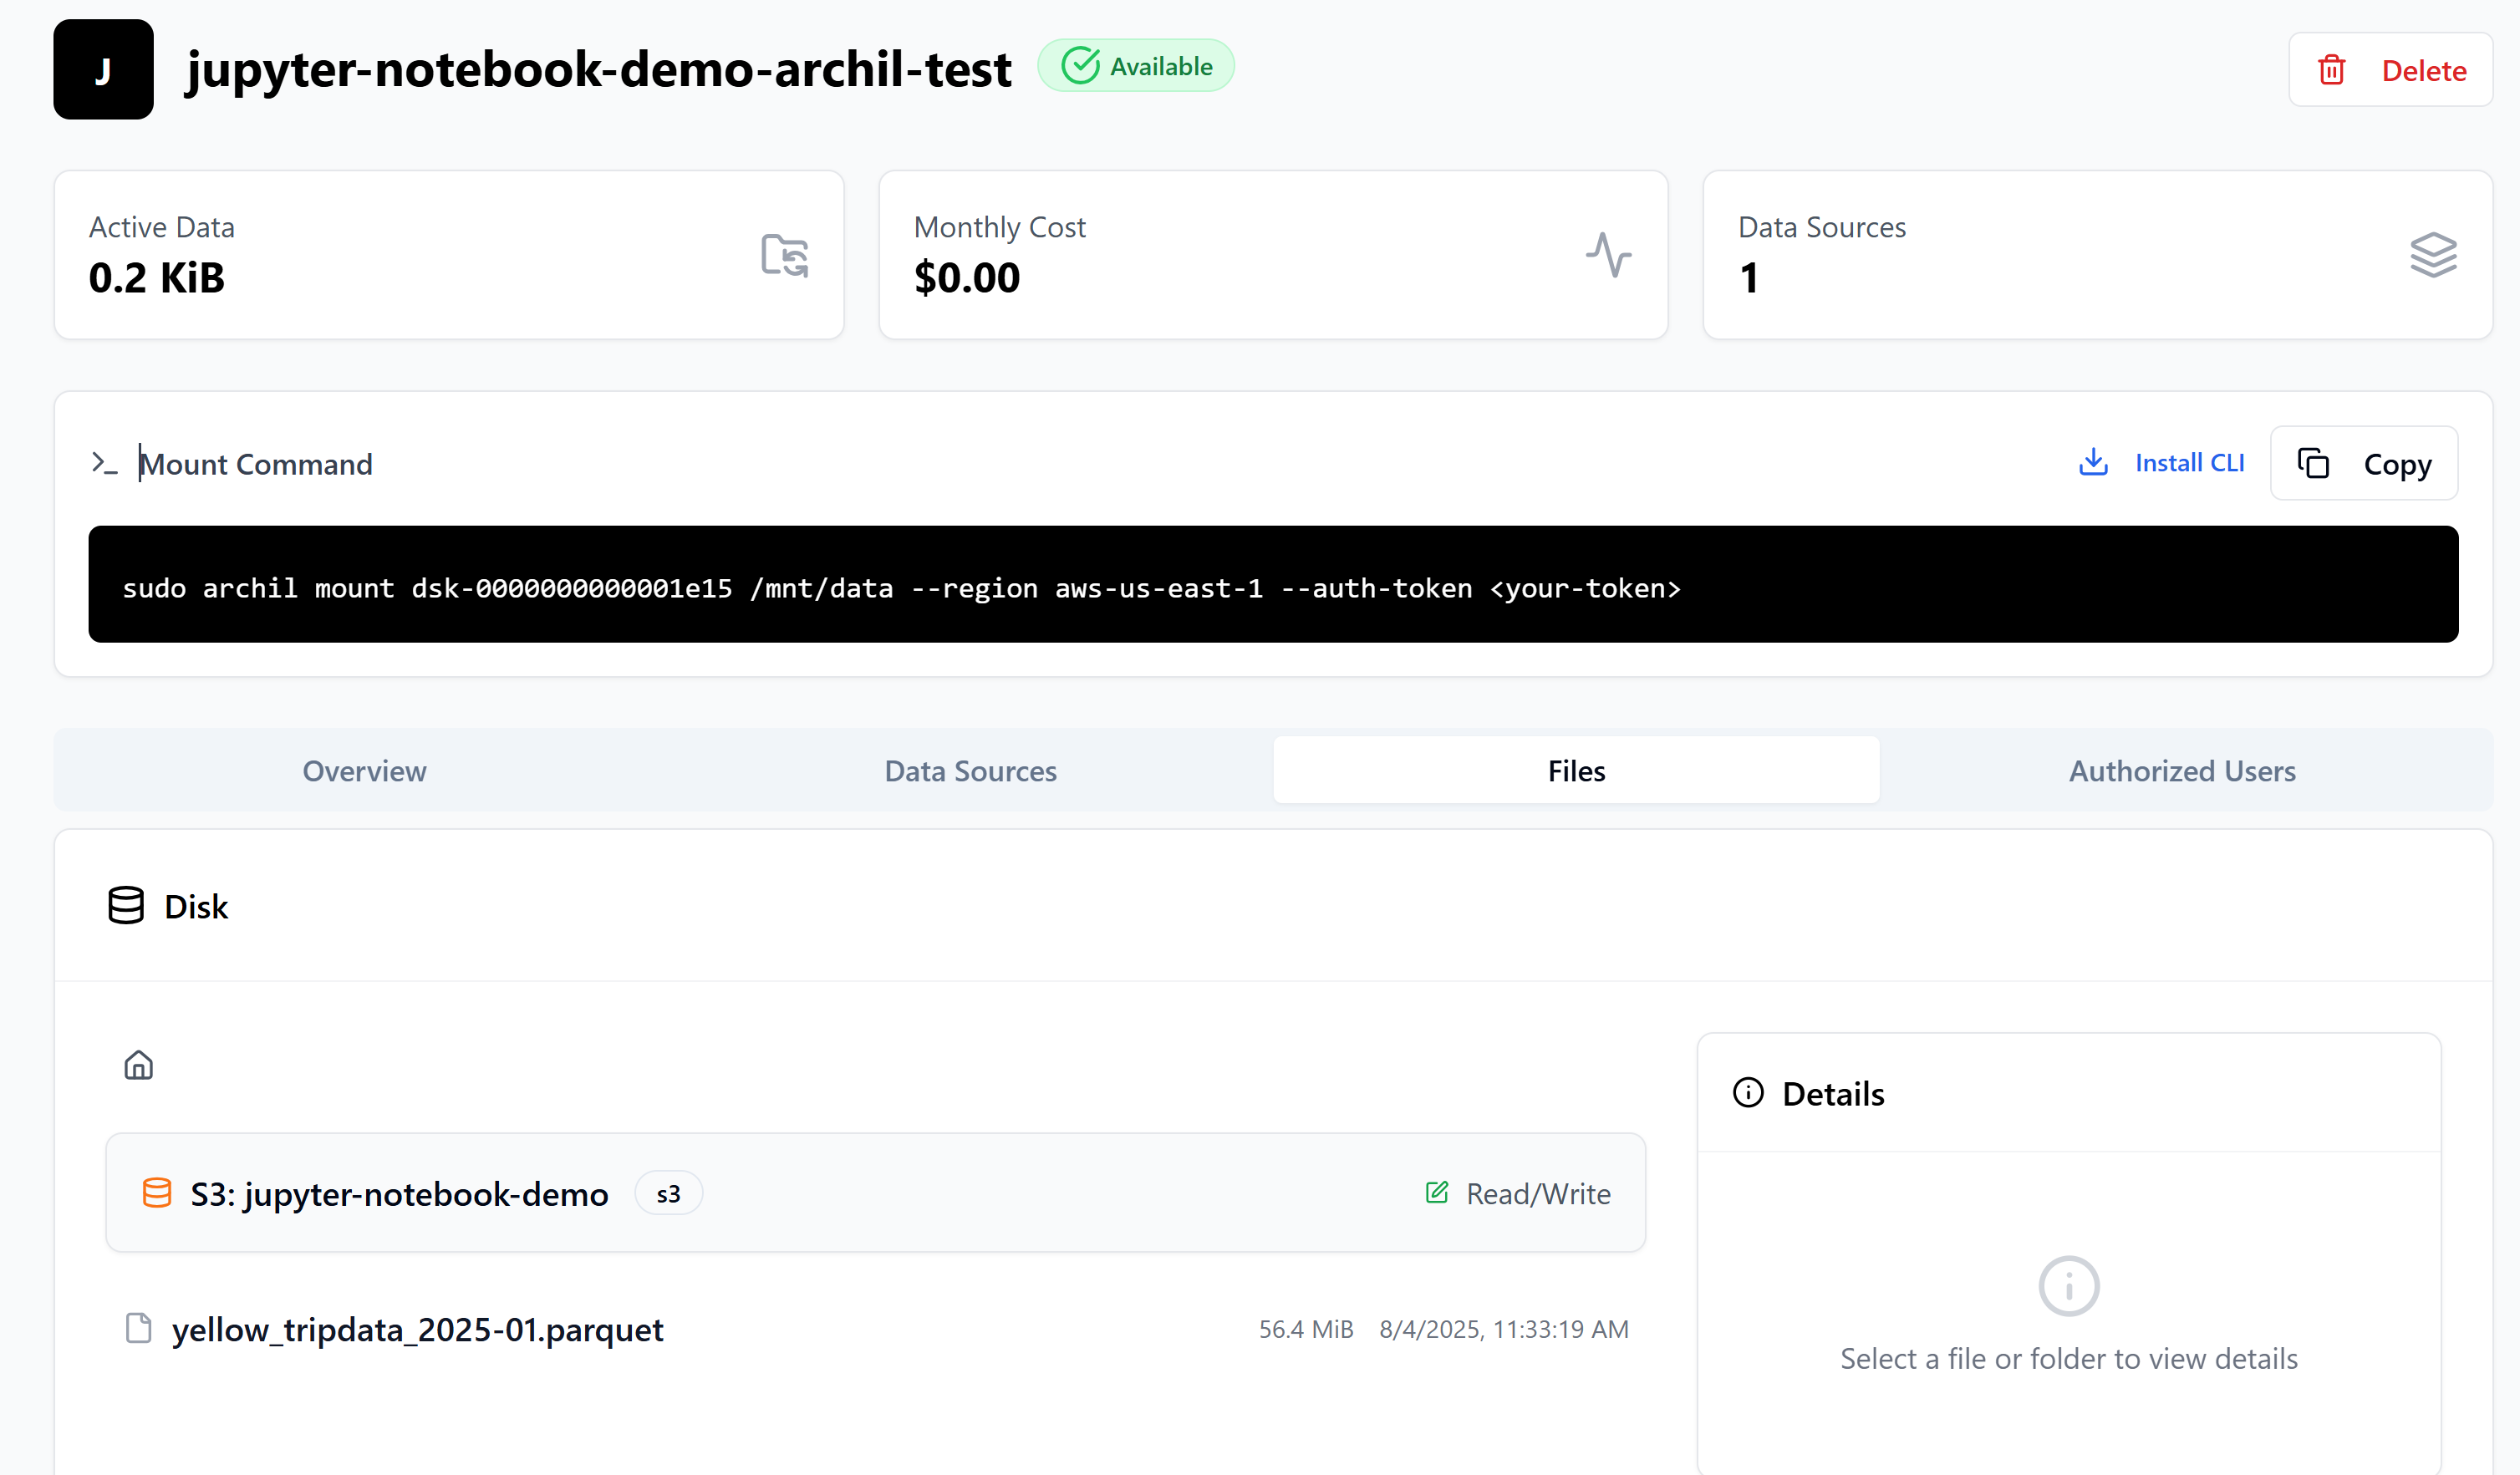
Once mounted, you’ll be able to read and write directly to S3-resident files using standard file paths. This unlocks a seamless and secure S3 analytics layer.
Step 5: Integrating Archil-Mounted Storage with Jupyter for Data Analysis
This setup eliminates the need for explicit S3 API calls, boto3 configuration, or temporary file management. Instead, you gain high-performance, direct file access to your S3 bucket through a familiar filesystem interface.
Create a ipynb file, and load in your data using standard file-system syntax.

Here is a sample Jupyter Notebook implementation that demonstrates how to access and analyze data stored in S3 through the Archil-mounted filesystem, showcasing the seamless integration between cloud storage and interactive data analysis:
%pip install --upgrade pip
%pip install "pandas>=2.2,<3"
%pip install pyarrow

import pandas as pd

# Direct access to S3 data via POSIX interface
df = pd.read_parquet("/mnt/archil/${FILE_NAME}.parquet")
df.head()
This setup allows you to work with S3 data as if it were local files, eliminating the need to write complex storage access code or manage API credentials. You can simply read and write files using standard paths.
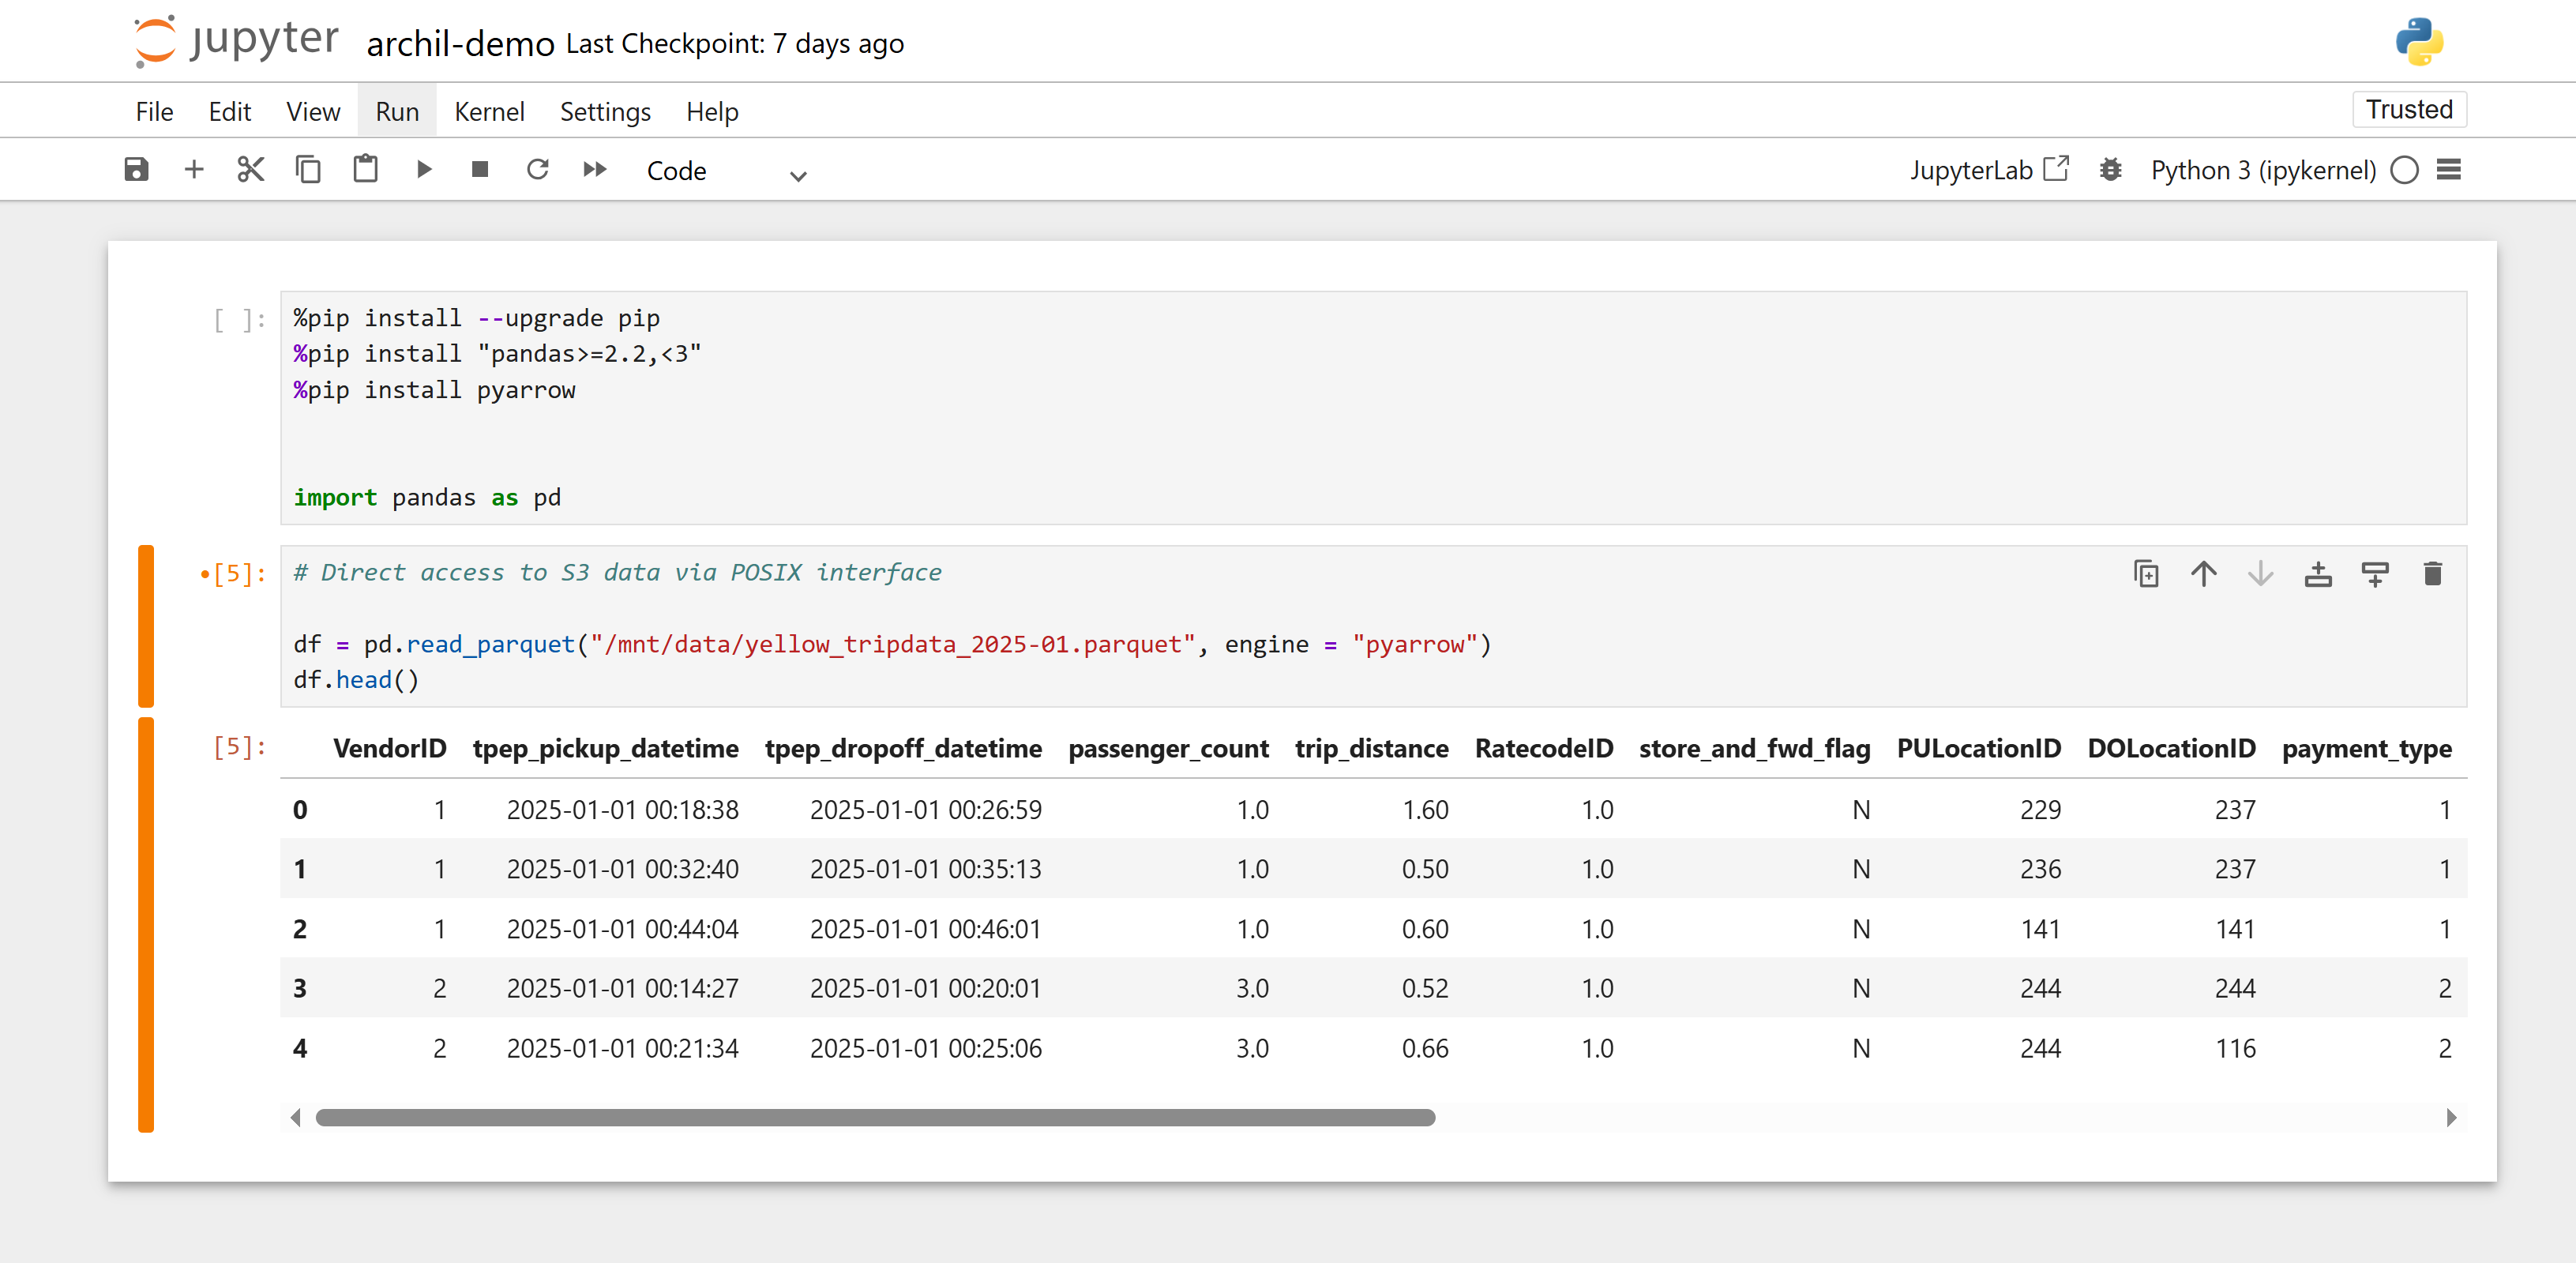
By mounting S3 as a POSIX-compatible filesystem, users can perform standard I/O operations through popular analytical libraries such as Pandas, Dask, and PyArrow without implementing additional storage access layers.
The beauty of this approach lies in its simplicity—data scientists can focus on deriving insights rather than wrestling with storage APIs or authentication mechanisms.
The mounted filesystem supports concurrent access, optimized operations, and maintains consistency across distributed workloads, enhancing analytical capabilities without sacrificing performance.
Conclusion: Simple, Powerful, S3-Native Notebooks
You now have established a robust, cloud-based analytical environment that combines the best of all worlds: Jupyter running securely on EC2 for data exploration and visualization, data safely stored in S3 with industry-leading security and reliability, and Archil bridging computation and storage with high-speed, file-based access.
This architecture eliminates the traditional complexity of cloud storage integration, allowing you to focus on generating insights rather than managing infrastructure—creating a seamless experience that feels like local development while harnessing the full power of the cloud.
Authors
